Sunday, June 30, 2013

Mint Sparkles Nails

Do you ever just wake up feeling... sassy? Or you are about to plan a hot night out and need the nails to match your attitude? Well mint is one of my personal favorite colors, matches everything I own, and it comes off classy and sexy at the same time. And why not add a little flare to your nails? Sparkles will catch anyones eye. Don't worry though, these nails are SUPER simple and only require three colors!

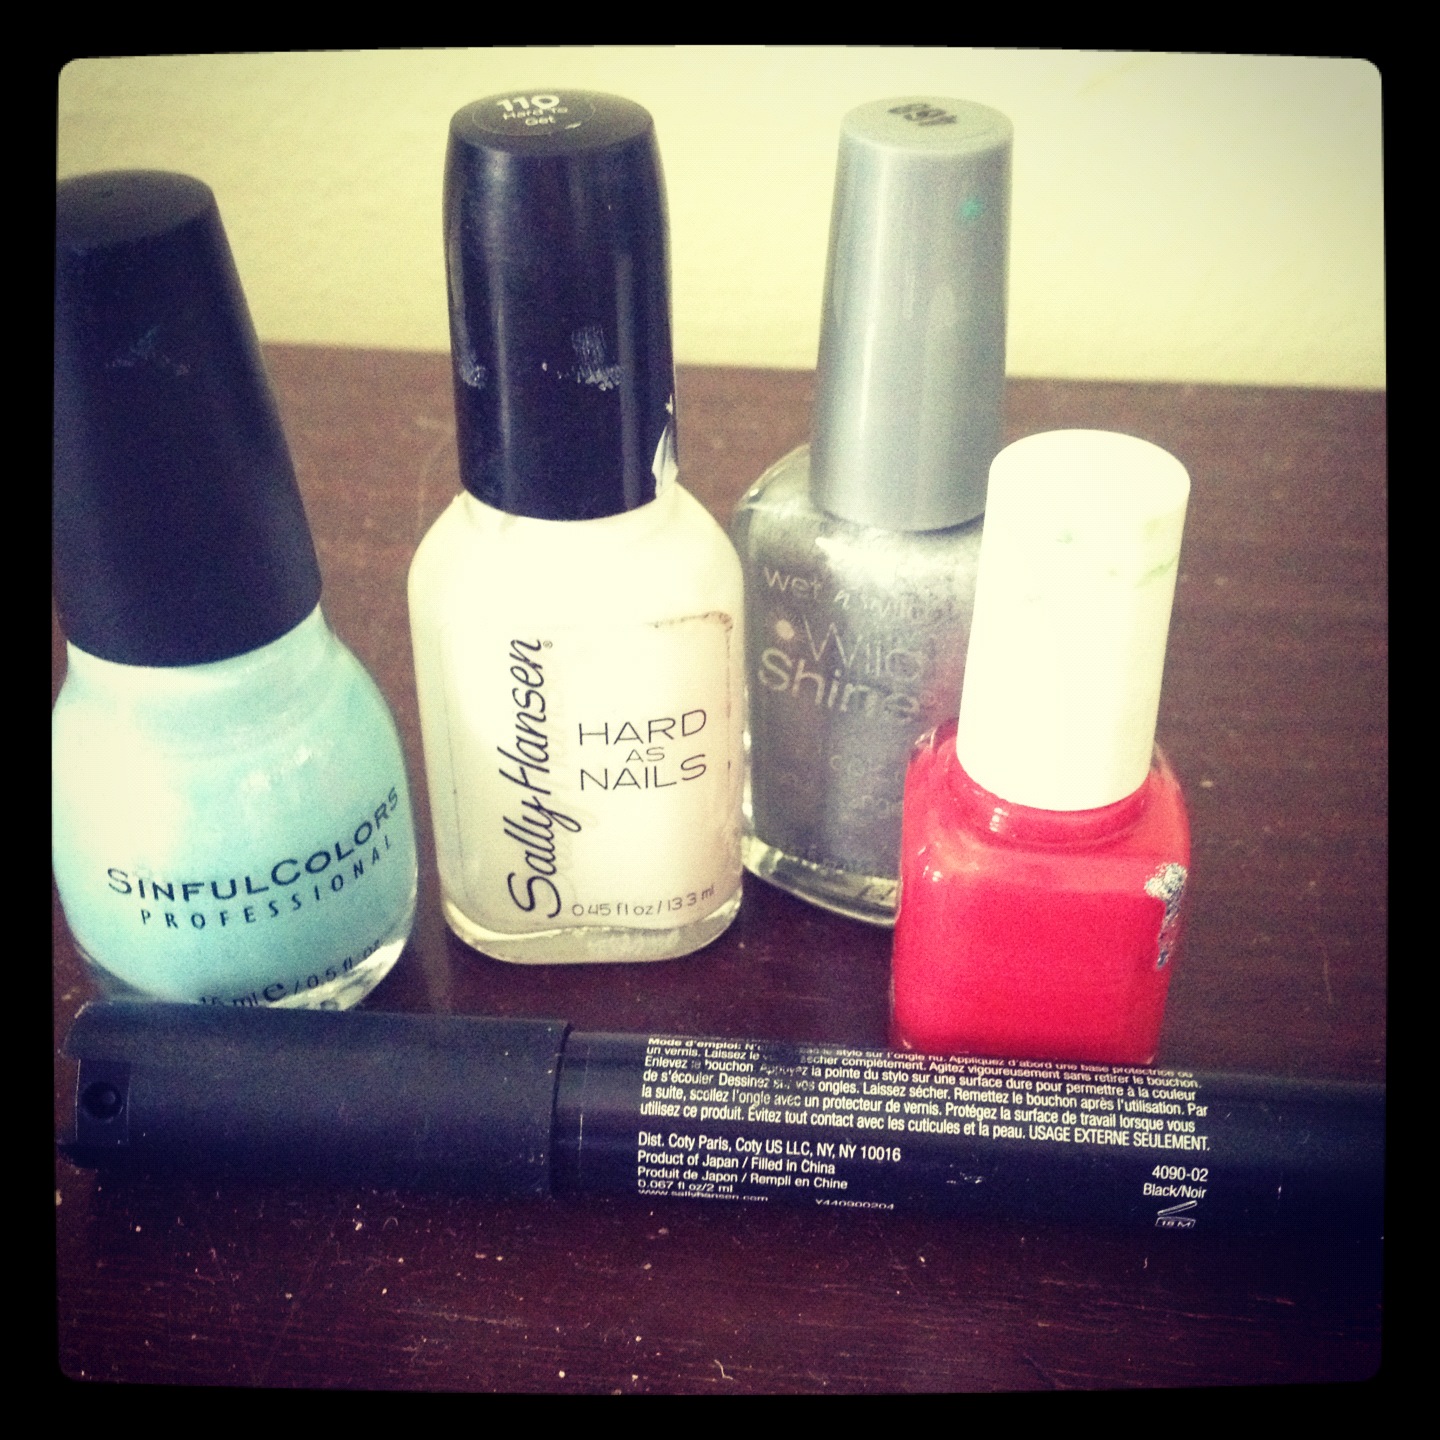
Mint, Navy Blue, and Sparkles (of any color)

You can choose to only use the normal brush for these nails if you have steady hands, or use a skinny brush to make things easier. It's up to you! If you're feeling a bit shaky today, I recommend you use a skinny brush, and if you don't have one, I'll show you how to make one! 

Click the link below to quickly read how to adjust your nail polish brush! (There will be a return link right on that page as well, so you don't get lost) 


STEPS

Step 1:
Paint your nails a solid mint color.

Step 2:
Paint a corner of your nail with the sparkly nail polish. An acute triangle shape. You may need to do more than 1 or 2 layers for this, depending on the polish you have. 


Step 3:
Use the navy blue to make a border between the sparkles and the mint paint, to give it more definition and make the colors pop. This line you can do with either a skinny brush or a normal brush.

See?! Super easy and super fabulous! It takes no time at all to do these nails and will have you standing out in a crowd. Nails are accessories too, and theres no reason to not have a little bling now and again.  


Rose Nails

I've never really been a gardener, but I do appreciate the beauty of a flower. Tis the season to dance through gardens, pick a flower or two and place them in your hair. These nails are designed to give you the essence of being in a rose bush, without all the pricks from the thorns. They are pretty simple, and you just need four different colors.

Gold, Green, Red and Black

One thing that I might have that you don't are all my "special" nail art tools! This design I use all three different brushes. My first, a normal nail polish brush, my second, a thinner brush to make smaller lines, and my third, is a nail pen. If you don't have the thinner nail brush or pen, this is what I would do (and have done)

Click the link below to quickly read how to adjust your nail polish brush! (There will be a return link right on that page as well, so you don't get lost) 


STEPS
Step 1:
Paint your nails a solid gold. (or really, whatever color you would like the back ground to be)

Step 2:
With steady hands with a normal brush, or a skinny brush, make lines randomly on your nails that resemble vines. You can do it more or less than what I did, whatever you prefer! 

Step 3:
Put a red dot by one of the vines, preferably in the middle of your nail. This will be your rose.

Step 4:
With a nail art pen or a small art tool you can dip into nail polish (that's what I had to do today because my black nail pen ran out... bummer), outline the red dots, then put swirls inside of the rose. The rose details are to the best of your ability. Mine don't look quite up to par since my nail pen was out, but my makeshift nail pen did just fine. You can figure it out, you little crafty diva.

Now you have elegant nails that say "I've been enjoying a nice glass of ice tea on my tire swing in my garden all afternoon and reading my favorite book." When in reality, you might have been watching Netflix all day. Thats fine! Just spice up your life a little with a mini nail make over! Rock on, flower child. 


Sunday, June 23, 2013

Nautical Nails

For me, living on an island makes me feel like these nails fit me quite well, either that, or the fact I'm engaged to a sailer. No matter the case, these nautical nails will bring the sailor out in all of us! (just try not to talk like one in front of the kids) They are simple enough to do, and cute enough to match any outfit. For these nails, the only colors yo need are white, dark blue, black and silver.

White, Dark Blue, Black and Silver


It took me three different kinds of brushes to do these nails. One skinny pen (you could also take any sort of skinny pencil and dip that in nail polish for those skinny lines), one skinny brush and one normal brush. If you don't own a skinny brush, you can make one for yourself!


Click the link below to quickly read how to adjust your nail polish brush! (There will be a return link right on that page as well, so you don't get lost) 


STEPS

Step 1:
Give your nails and base coat of white.


Step 2:
Take the skinner brush to make fine, dark blue lines. Leave your ring finger nail blank for now, that's if you want to do an anchor accent nail. 


Step 3:
With a finer brush, use silver to draw an anchor on your ring finger. To break it down, draw a circle, a horizontal line under that, one vertical line going down the middle, then end that with a half circle at the bottom. It really is very easy!


Step 4:
You don't have to do this step, but I did. Draw dark blue lines behind the anchor. 


Step 5:
The finishing touches! I just outlined the anchor with a black pen to make it stand out more. You don't need to do this step either, but I think it looks nice!


All done! Now you look like you're ready to sail the seven seas! Paint up, you land lovers, and show your inner seaman. 


Bow Nails

Summer is the time for dresses and bows, and what would look awesome with that new summer dress? That's right! Matching bow nails! These nails can be what ever color you desire them to be. I chose a white back ground with bright pink bows, but I could have chose a light blue background with yellow bows, or dark blue with a white bow, the list goes on and on. 


It took me three different kinds of brushes to do these nails. One skinny pen (you could also take any sort of skinny pencil and dip that in nail polish for those skinny lines), one skinny brush and one normal brush. If you don't own a skinny brush, you can make one for yourself!


Click the link below to quickly read how to adjust your nail polish brush! (There will be a return link right on that page as well, so you don't get lost) 


STEPS
Step 1:
With the normal nail polish brush, paint the back ground color of your nails. I chose white.


Step 2:
With the nail art pen (or dipping a pencil or old small tip marker into nail polish) draw a little circle in the top center of your nails.


Step 3:
With the same pen you used to draw the circle, draw two triangles on both sides of the circle. 


Step 4:
Continue using that pen, draw two ribbons coming from the bottom of the circle.


Step 5:
Color in your bow with whatever color your hear desires!


Step 6:
With the nail pen, correct all the little mistakes you might have made. 


Now your nails look just as fresh as you do! Paint them to match a new skirt, a bathing suit, or even a cute pair of sunglasses! (Or a brand new engagement ring... you like?) 

Saturday, June 15, 2013

Pokemon Nails

I don't know about you, but I've always dreamed about becoming a Pokemon master and, of course, "Catching em all". If you have too, then maybe these nails are for you! Pikichu is one of the most recognized Pokemon. One because of its importance in the show, and two, because Pikichu is so dang adorable! Today I will show you how you can get yourself your very own Pikichu! 

I put an accent nail on his hand as well, a poke ball. Mostly because it suits the theme of Pokemon and would be a super easy nail to paint, among all of the Pikichu faces. These nails take a bit of skill, but more of steady hands because of the detail in the face. I did it with my left hand, so I think most of you won't have much of a problem with it. 

There are four colors you need today

Yellow, Black, White and Red


It takes two types of brushes to make these nails. I use a white and a black pen for the little details. If you don't have any pens, you could make yourself a skinny brush that could work just as well. I can show you how you can make one yourself, without going to the store! 

Click the link below to quickly read how to adjust your nail polish brush! (There will be a return link right on that page as well, so you don't get lost) 


STEPS

Step 1:
Paint your thumb, pointer, middle and pinky finger nail yellow and your ring finger white.


Step 2:
Give all of your yellow finger nails mouths and give your white finger nail a circle in the middle and two lines extending out of that. You will want to use your skinny brush or nail pen for this kind of detail. If you take your time, the lines will really turn out well!


Step 3:
Give your yellow finger nails two red dots by the mouth using a normal sized brush, those will be Pikichu's cheeks, and paint the top of the poke ball red. Once you have painted the poke ball red, you are done with that nail!


Step 4:
Give all of your yellow nails two eyes using a normal sized brush. Then with the pen or skinny brush, give pikichu a little dash mark for the nose.


Step 5: 
Take your skinny brush or pen and make triangles on the top of its head. Try to make them as long as you can. As you can see, mine are very short so I couldn't really fill in the top of them with a little black, but the longer you make them, the easier that'll be. 


Step 6:
Last but not least, inside of the eyes, but a tiny white dot inside of them. This will be the finishing touches to your Pikichu! 


Once you paint your nails with my Pokemon design, you will be shouting at everyone saying "I choose you Pikichu!". Your nails will have everyone asking "is that Ash Ketchum?" and you will have the urge to explore! Enjoy!

Star Trek Nails

These Star Trek nails are bound to please the Trekky in all of us. Fans as low key as seeing the new movies all the way to die hard, Star Trek is your life, being able to quote all the the episodes of the original series, next generation, and all of the movies, can all enjoy theses nails. For myself, I do thoroughly enjoy Star Trek and think it is a good way of showing my love for it and also, it seems to be really "in" right now (unlike most people though, I actually watch the shows).

Any-who! These nails and super simple, and can make you look 10 pounds skinner! Just kidding about that last part, but they do go with a lot of different outfits. What I did was put in an accent nail and I chose Spock's blue for the main nails and Scotty's red for the accent nail. (or a red accent nail honor all the red shirts that have lost their lives on the line of duty.) You don't need to do the accent nail of course, but it is a nice touch and gives a more complex look to such a simple design. 

You'll need five colors today

Light Blue, White (optional), Silver, Red, and Black

To make the outline of the badges easier, I use a black nail pen. A skinny brush will also work just fine, you would just have to move nice and slow. If you don't have a skinny brush or nail pen, I have a method for making one of your own!


Click the link below to quickly read how to adjust your nail polish brush! (There will be a return link right on that page as well, so you don't get lost) 


STEPS

Step 1:
This is where the optional white comes in. Whenever I have a really light color, in this case blue, I make the white a base coat so the blue will come in more vibrant. You don't have to do this, it just saves you some time with layering up softer colors. 
Whether or not you put the white as a base coat, you will now paint your pinky, middle, pointer and thumb blue and then paint your ring finger red, like so...

Step 2:
Take your black pen, or skinny brush and make the badge shape. To make it, you an arrow head shape, except one point is longer than the other. It is quite hard to explain, that is why I have pictures. 

Step 3:
Once you have the outline of the badges, you fill them in with the silver. I used a normal brush to fill them in, but you can also use a skinny brush to be more exact. Don't feel the need to be perfectly in the lines, because you will eventually go back over the black outline once more.
Step 4:
Once you fill in the silver, it'll look a little messy. All you need to do is go over the black outline one more time to really clean it up!

And there you have it! Nails and will have you saying "Live long and prosper". Also, sorry for all those Captain Kirk fans out there, if I had a yellow/green color, I would have honored him too, but to be honest, Spock is my favorite. You're welcome Spock.

Tuesday, June 11, 2013

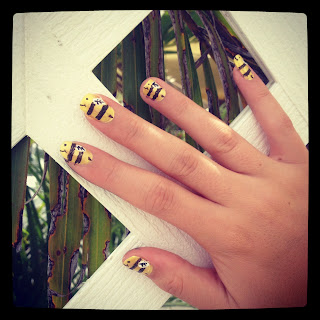
Bee Nails

Are you a busy bee? The bee's knees? Need to explain the birds and the bees?... Well, let's not go there. What I'm trying to get at is, do you have bees on your mind? It's the start of summer you know and we are all watching out for those little stinkers! When you really look at them though, they are kind of adorable and what would be super cute with that bikini or summer dress? BEE NAILS! (minus the stings!)

These nails do require a bit of skill to do, but if you give yourself time, you'll do just fine. For this demonstration, I painted my right hand, which means I used my left... duh duh duh. We all know how our non-dominate hand always looks wonderful when our other hand looks like we got into a tragic accident at Sherwin-Williams, but after much practice, you'll be able to match them up pretty evenly. (And to be honest, I did a pretty dang good job for my using my left hand.)

You'll need three colors today

Yellow, White, and Black


And to make life easier, try to use a thick brush for both the yellow and white, and a thin brush or nail pen for the black. If you don't have a thin brush, I'll show you how to make one!

Click the link below to quickly read how to adjust your nail polish brush! (There will be a return link right on that page as well, so you don't get lost) 


STEPS
Step 1: 
Paint all of your nails a solid yellow. Since yellow is a lighter color, you may have to give yourself 2 or 3 coats. 

Step 2: 
Put an oval of white in the top center of your nail. This will be the wing of the bee. 

Step 3: 
Place a small triangle at the bottom of your nail. This will be the stinger. (ouch!) 

Step 4: 
Right behind the wing, make one thick black line, and then right in front of the wing make another black line. There should only be room for two black lines. These will be the bee's stripes. 

Step 5:
Alright, this is really starting to look like a bee! Now give your little nail bees happy faces. (or whatever face you so desire. My bees are always happy.)

Step 6:
Give the wings some detail. It really brings everything together. What I do is draw a single line, then do little branches from there. 

And there you have it! My bees went and played outside, what will yours do?


Strawberry Nails

The "Strawberry Nails", as I like to call them, were one of my first designs! They are super simple and all you need  are three different colors...

Pink, Green and Black


One thing that I might have that you don't are all my "special" nail art tools! This design I use all three different brushes. My first, a normal nail polish brush, my second, a thinner brush to make smaller lines, and my third, is a nail pen. If you don't have the thinner nail brush or pen, this is what I would do (and have done)

Click the link below to quickly read how to adjust your nail polish brush! (There will be a return link right on that page as well, so you don't get lost) 

STEPS
Step 1:
Paint all of your nails a solid pink. Easy enough?


Step 2:
Take a thinner brush (or if you are feeling lucky you can use the standard thicker brush), and paint the bottom of your nail with a strip of green. That will give it the green leaf look. 


Step 3: Ok, last step! Take the black nail pen (or any black nail polish you can trust yourself with) and make small dots all over your nails. Those will make up the seeds. 


Wow! That was easy, and now you are feeling all snazzy. These are good summer nails that you can sport going to the beach, mall, or heck, even just around the house. They are super cute and will pop with any outfit. You go girl! (or boy, I don't judge)


How to Make a Thinner Nail Polish Brush for Those Small Designs

How to make a thinner nail polish brush for those small designs... Easy!

You: "Easy you say?"

Me: "Just you wait and see!"

First things first, we all have those bottles of nail polish that we never use, like that awkward purple that doesn't match anything or that pink that chips too easily. You may also have your favorite color that is your go-to color whenever you are about to go out, you need a quick fix before work, or you love wearing flip flops and in order to look like a woman instead of a hobbit with trench foot you paint them your favorite color that matches everything you own and you keep reapplying that same color since half of the paint chips off and the other half refuses to come off for the next 10 years. Plus who the heck has time to remove half of the polish?! Whatever the case is, that nail polish is almost out. Instead of throwing out the bottle, I'll give you something to do with it!

In order to make some of the designs I do, I need a smaller brush. Some of you guys just might be so talented that you can make the thinnest line from a normal brush, but for the majority of us who have the coordination of a new born calf, a smaller brush can really come in handy.

This is how to make it from your average, everyday brush...


STEPS
Step 1: Find your victim nail polish 

Step 2: Clean off all of the excess nail polish off of the brush

Step 3: Take scissors and cut the brush in half


Step 4: Split the bristles in half and cut half off so it is half as thick


There you have it! Now you have a brush that you can use in any of your favorite nail polishes! Start adding more details to your life. 

Back to were you came from...
Star Trek Nails
http://beyourownsalon.blogspot.com/2013/06/star-trek-nails.html
Pokemon Nails
http://beyourownsalon.blogspot.com/2013/06/pokemon-nails.html
Nautical Nails
Fun Summer Manicure
Palm Nails 1. Summer Caribbean Collection
http://beyourownsalon.blogspot.com/2013/07/palm-nails-1-summer-caribbean-collection.html
Bikini Babe Nails. 2. Summer Caribbean Collection
Beach Nails. 3. Summer Caribbean Collection